
Introduction
A while ago, I wrote a Salesforce app to be used as example of the kinds of apps that can be built on the Salesforce platform. It is called Shared Rides and is a carpooling app to offer and accept shared rides via Chatter. You earn green mile credits which can be tracked on a dashboard. It is available as a Salesforce App Cloud Quick Start App and can be downloaded as a managed package from here.
Salesforce has recently introduced a new look and feel called Lightning Experience (LEX) along with associated tooling to help you develop apps that use it. It is a component based framework (Model View View Controller), as opposed to the Model View Controller framework that Classic uses. I decided to check whether my app worked in the new interface and make any changes necessary take advantage of all the benefits of being a Lightning app.
There are some great training modules in Trailhead. The trail Migrate to Lightning Experience tell you a lot of what you need to know to understand LEX and, in particular, the unit Upgrade a Classic App to a Lightning App in module Lightning Apps gives the recommended steps for upgrading.
The Standard Steps
So here are the steps I took:
- Create a fresh org to develop and test the app one
- Install the app package that I wanted to upgrade into the new org.
- Enable Lightning Experience for the org and switch into it.


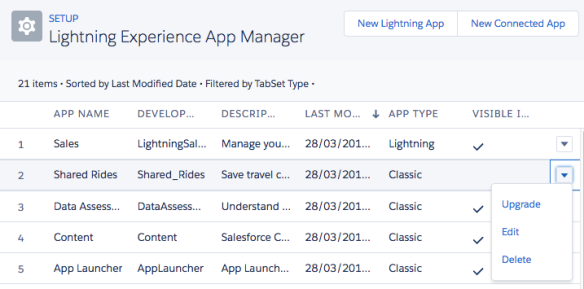
- From Setup, enter App in the Quick Find box, then select App Manager.
- Find your app in the list. In my case, It’s called Shared Rides.
- Click the pulldown from the app row, and select Upgrade.
- Leave the suggested name as-is, e.g. “Shared Rides Lightning” and click Upgrade.
- The Classic app is copied and upgraded for Lightning Experience. There are now two versions of the app: a Classic version, and a Lightning version. After you upgrade it, the Classic app is no longer accessible in Lightning Experience via the App Launcher. You’ll still see the Classic app in the apps list, but with the Visible in Lightning column deselected.

- After you upgrade a Classic app, the two versions of the app must be managed separately. Future changes you make to the Classic app won’t be reflected in the Lightning version of the app, and vice versa.
- Back in the Lightning Experience App Manager, find the Lightning app in the list.
- Click from the Lightning app row, and select Edit.
- Update the description if needed as the app description displays alongside the icon in the App Launcher, so it’s a great way to tell your users what the app is for, but keep it brief.
- In the App Branding section, change the Primary Color to something appropriate and also upload an image.


- Open the Dev Console

- Create a new Lightning Component.
- Give the component the nameAcceptRide.
- I selected Lightning Record Page and Lightning Quick Action.
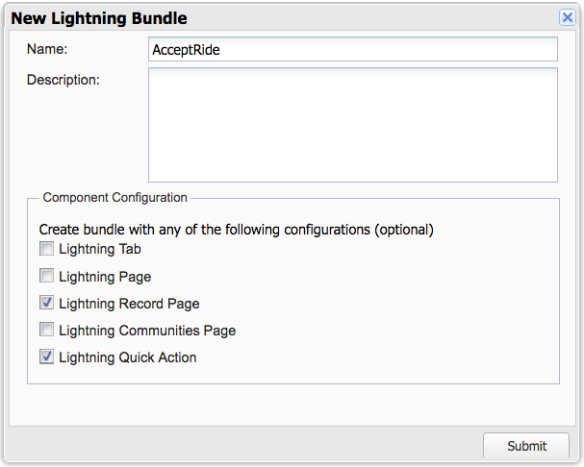
- Then I replaced the contents of the component with the following:
- Click the Controller button in the Dev Console.
- Replace the contents of the controller with the following and then save it
- In the Dev Console, create a new Apex Class,File > New > Apex Class.
- Give it a name ofAcceptRideApexController.
- I replaced the contents with the following and saved it.
- Save the file.
- Ensure that the Apex controller is referenced in the tag in AcceptRide.cmp file i.e. controller=”AcceptRideApexController”
- Ensure that force:lightningQuickActionWithoutHeader is an implements attribute of the component.
- Save all the files.
- Navigate back to the Object Manager and choose the Shared Ride object.
- Scroll down to the Buttons, Links and Actions section.
- Click the New Action button.
- Select Lightning Component as the Actions Type.
- Select c:AcceptRide as the Lightning Component and set the height to 400px.
- Type Accept Ride in the Label field and Accept_Ride becomes the name.

- Click Save.
- Navigate back to Shared Ride object page and click the Shared Ride Layout in the Page Layouts section.
- Click the override the predefined actions link in the Salesforce1 and Lightning Experience Actions section.
- Click the Salesforce1 & Lightning Actions link in the Property Layout box.
- Drag the Accept Ride tile to the Salesforce1 and Lightning Experience Actions section and place it as the first item. Remove the buttons that you don’t need.
- Click the Save button in the Shared Ride Layout box.
- Navigate back to a Shared Ride Record page. If the changes don’t appear then force refresh the page.

- Click the Accept Ride Quick Action button to accept the offer.
- In my case I have different page layouts for different record types and I change record type each time someone accepts a ride. I needed to change each of these layouts.


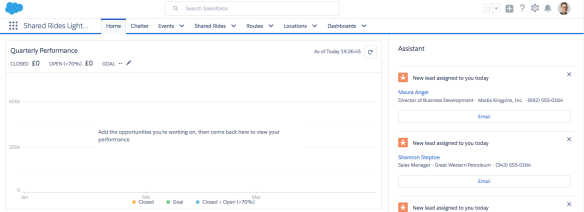
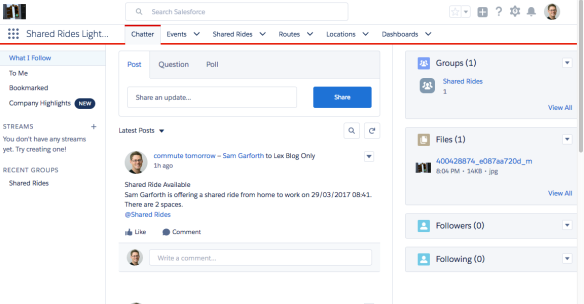
So now the Lightning app is available in the App Launcher and it even has the data from the old version

Adding the Enhancements
However, it’s not taking advantage of the great enhancements that Lightning apps can offer. So we go through the following steps.

After saving, click the Select Items tab, and remove the Home tab from the Selected Items list by selecting it and then clicking the ‘<’ button between the two columns. Then ensure you’re happy with the other items and click ‘Save’ and .Done’.
Now, when you go into the App Launcher the app should be there with the correct branding. The changes may not appear immediately as the page is cached. You may need to force a reload of the browser.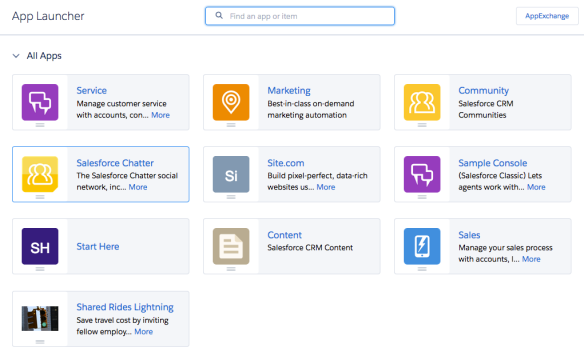
That brings us to the end of the official instructions. Now comes the testing.
Further Tidying
The new version of the app has quick action buttons for ‘New Contact’ and ‘New Opportunity’. These aren’t relevant to a car sharing app so I need to remove them.
Also, there is a pane with functionality for activity, new task, log a call etc which is not relevant.
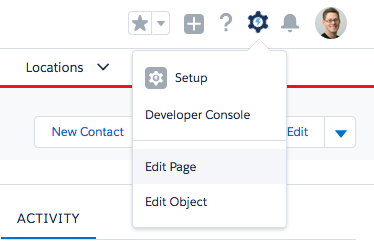
So click on ‘edit page’
This takes you into Lightning App Builder. Highlight the Activity pane.
and click the x in the top right corner of the pane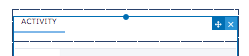
Ideally you would want to change the layout of the page (template) but in my case this option in not available. Perhaps it’s inherited.
Now we need to remove the ‘New Contact’ and ‘New Opportunity’ buttons so click on the pane that contains these i.e. the Highlights Panel.
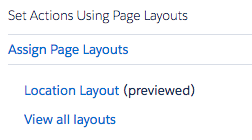
On the right hand side it tells you which page layout you are using for the actions. Click through to it, in my case I click on “Location Layout”.
Scroll down the page layout setup page to the Lightning Experience section and click on the ‘override the predefined actions’ hyperlink.

Remove the actions you don’t want by dragging them up to the Lightning Actions palette.
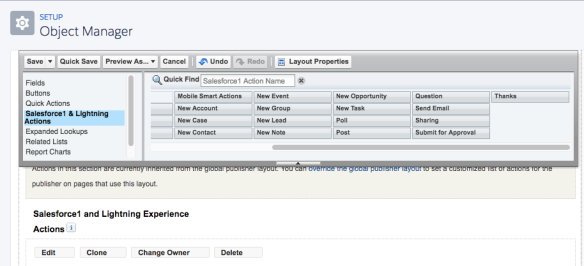
then click ‘Save’.
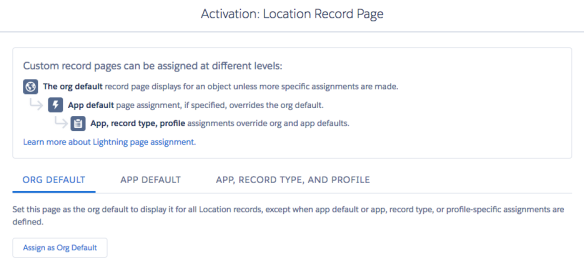
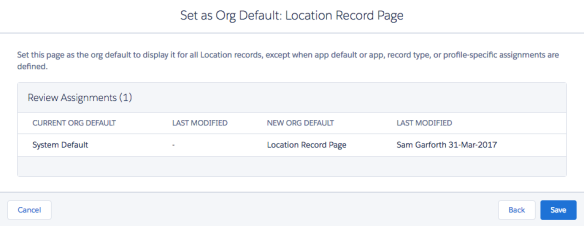
Go back to the Lightning App Builder page and click ‘save’ to save the other changes and then select ‘Activate’.
Select what level you want to assign the page as the default for. I selected ‘Org Default’.
Click ‘Back’ to go out of the App Builder back to the page. I can see that my changes have taken effect.
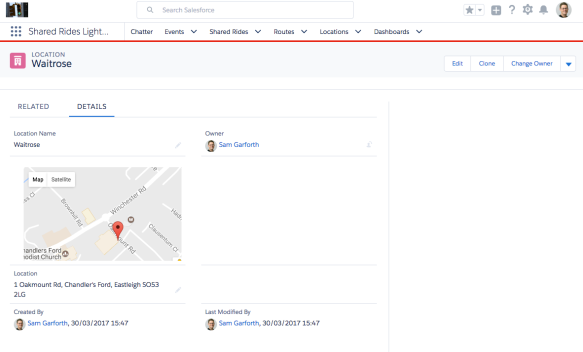
These changes only affected the Location page. I still needed to go through the same steps to adjust the layout and actions on the other pages.
JavaScript Button
In the Classic version of my app I had an “Accept Ride” button which someone could click to say that they would like to share a journey that had been offered.
This was a JavaScript button.


JavaScript buttons are not supported in LEX so instead I needed to create a Lightning Component Quick Action button. So, these are the steps I took:
Create the Lightning Component
Add a Component Controller
({
handleAcceptRide: function(component, event, helper) {
var sharedRide_id = component.get("v.recordId");
var action = component.get("c.getSharedRide");
action.setParams({
"sharedRideID": sharedRide_id
});
action.setCallback(this, function(response) {
var res = response.getReturnValue();
var resultsToast = $A.get("e.force:showToast");
if (res) {
resultsToast.setParams({
"title": "Ride Accepted",
"message": "You have been added to the Shared Ride riders list."
});
} else {
resultsToast.setParams({
"title": "Error",
"message": "Sorry, you could not be added to the Shared Ride riders list."
});
}
resultsToast.fire();
$A.get("e.force:refreshView").fire();
var dismissActionPanel = $A.get("e.force:closeQuickAction");
dismissActionPanel.fire();
});
$A.enqueueAction(action);
}
})
Create the Apex Controller
public class AcceptRideApexController {
@AuraEnabled
public static Boolean getSharedRide (Id sharedRideID) {
PSE_Shared_Rides__c rideToUpdate = [SELECT Id, Number_of_spaces__c FROM PSE_Shared_Rides__c WHERE Id = :sharedRideID];
Decimal spacesleft = rideToUpdate.Number_of_spaces__c;
if (spacesleft  0 ) rideToUpdate.Number_of_spaces__c = spacesleft - 1;
update rideToUpdate;
return true;
}
}
The original javascript looked like this:
/* */
{!REQUIRESCRIPT("/soap/ajax/32.0/connection.js")}
try{
var rideToUpdate = new sforce.SObject("PSE_Shared_Rides__c");
var spacesleft = "{!PSE_Shared_Rides__c.Number_of_spaces__c}";
rideToUpdate.Id = "{!PSE_Shared_Rides__c.Id}";
if (spacesleft == 4) rideToUpdate.Ride_Sharer_4__c = "{!$User.Id}";
if (spacesleft == 3) rideToUpdate.Ride_Sharer_3__c = "{!$User.Id}";
if (spacesleft == 2) rideToUpdate.Ride_Sharer_2__c = "{!$User.Id}";
if (spacesleft == 1) rideToUpdate.Ride_Sharer_1__c = "{!$User.Id}";
if (spacesleft > 0 ) rideToUpdate.Number_of_spaces__c = spacesleft - 1;
var result = sforce.connection.update([rideToUpdate]);
if(result[0].success === "true"){
location.reload();
}else{
alert(
"An Error has Occurred. Error: " +
result[0].errors.message
);
}
}catch(e){
alert(
"An Unexpected Error has Occurred: Error: " + e
);
}Make the component a Quick Action

Create the Test Class
So now, although the app is working I want to be able to package it and share it to other users and orgs. For this I need a test class for the new apex code. Here is my new test Apex Class:
@isTest(seeAllData=true)
private class PSE_TestAcceptRide {
static testMethod void myUnitTest() {
Test.startTest();
PSE_Location__c l1 = new PSE_Location__c();
l1.Location__c = 'SO53 1JA';
insert l1;
PSE_Location__c l2 = new PSE_Location__c();
l2.Location__c = 'EC2N 4AY';
insert l2;
PSE_Route__c r = new PSE_Route__c();
r.Start_Location__c = l1.Id;
r.Destination__c = l2.Id;
r.Name = 'Chandlers Ford to SFT';
insert r;
update r;
PSE_Shared_Rides__c s = new PSE_Shared_Rides__c();
s.Name = 'Test Ride';
s.Route__c = r.Id;
s.Time__c = Datetime.newInstance(2015, 10, 17);
s.Number_of_spaces__c = 3;
try
{
insert s;
update s;
AcceptRideApexController.getSharedRide(s.Id);
AcceptRideApexController.getSharedRide(s.Id);
AcceptRideApexController.getSharedRide(s.Id);
AcceptRideApexController.getSharedRide(s.Id);
AcceptRideApexController.getSharedRide(s.Id);
}
catch(System.DMLException e)
{
e.getMessage();
}
Test.stopTest();
}
}
Package The New App
Once the app is working it needs to be packaged if you intend to share it as a package. So go to the Package Manager and select ‘New’. Give it a name and save it and select ‘Add’ to add the components.
Start with component type App and select both versions of your app. At first I just selected the Lightning one but then it will only work in LEX. You need the classic version too for people who don’t have LEX.
I also had to manually add the Apex test class and the AcceptRideController.js
Select Upload and fill in the fields.
Conclusion
This was my personal experience of upgrading a packaged app with a JavaScript button to Lightning Experience. I hope you found it useful. I would welcome any comments on improvements I could make to my process and also other learnings you have had upgrading other apps.
